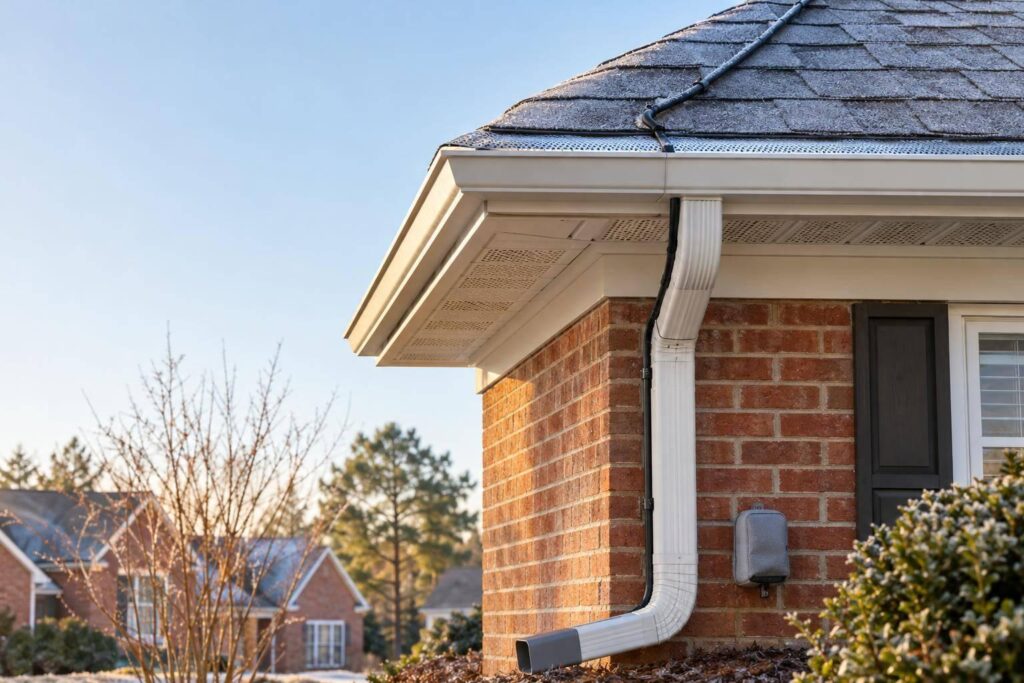
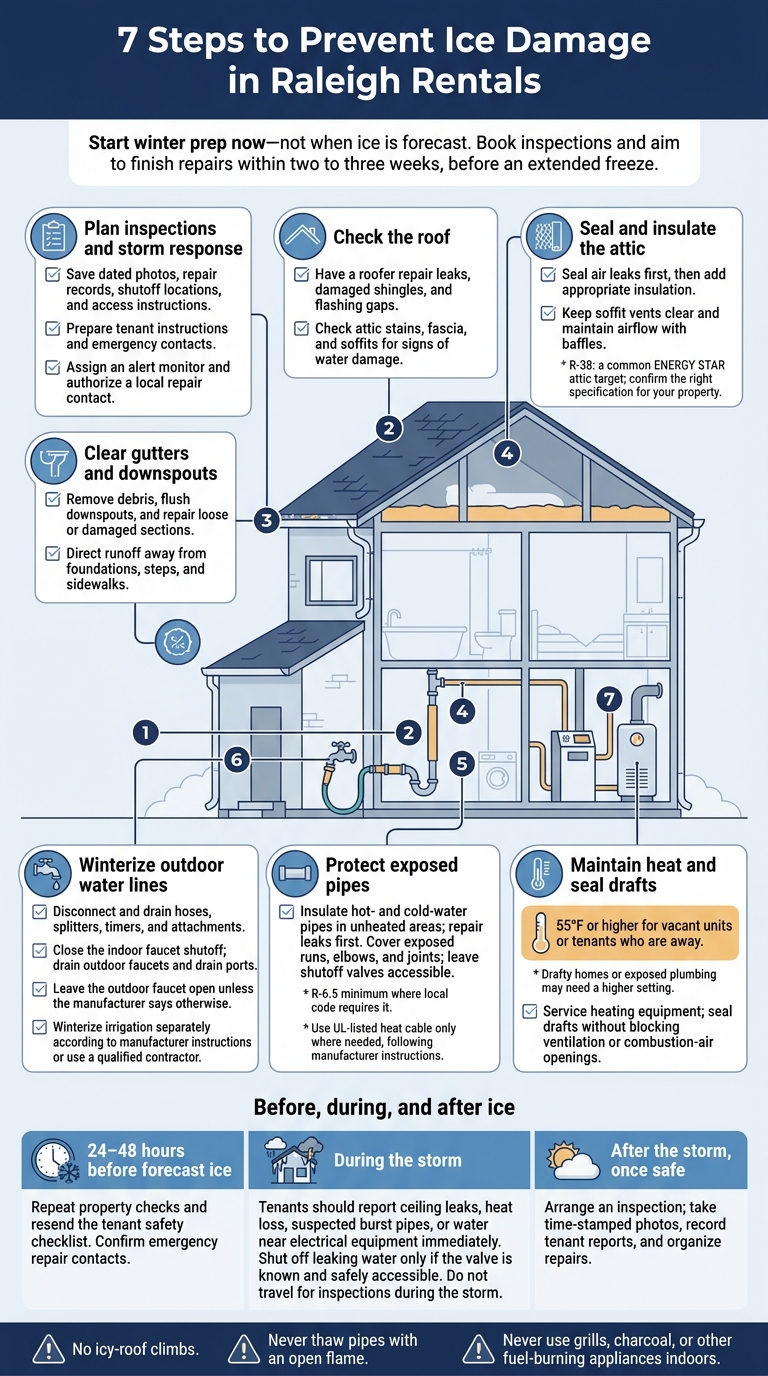
I’d start winter prep now, on November 2 – not when ice is forecast. For a Raleigh rental, I’d book inspections and aim to finish repairs within two to three weeks, before an extended freeze.
Here’s my seven-part checklist:
- Plan inspections and storm response: Save photos, shutoff locations, tenant instructions, and emergency contacts.
- Check the roof: Have a roofer repair leaks, damaged shingles, and flashing gaps.
- Clear gutters and downspouts: Keep meltwater moving away from the foundation and walkways.
- Seal and insulate the attic: Reduce escaping heat while keeping vents clear.
- Protect exposed pipes: Insulate plumbing in unheated spaces and repair leaks.
- Winterize outdoor water lines: Disconnect hoses, drain faucets, and prepare irrigation systems.
- Maintain heat and seal drafts: Keep vacant units at 55°F or higher, with a higher setting where plumbing needs it.
My final step: send tenants a short safety checklist before each freeze, repeat checks 24–48 hours before forecast ice, and arrange a post-storm inspection once conditions are safe. <u>No icy-roof climbs or open-flame pipe thawing.</u>
7 Steps to Prevent Ice Damage in Raleigh Rentals
1. Plan Inspections and Ice-Storm Response
After inspections, put together a storm file for the property so you can act fast when ice is forecast. The goal: make decisions before leaks spread or pipes burst.
Include dated inspection photos, repair records, water shutoff and electrical panel locations, and access instructions. Photograph any existing leaks or damage so you can tell preexisting problems apart from storm damage.
Assign one person to monitor National Weather Service alerts and Raleigh emergency updates. Start final checks 24–48 hours before the forecast event. An Ice Storm Warning may arrive only 12–36 hours before damaging ice is expected.
Keep a single contact sheet for backup plumbers, HVAC technicians, roofers, utilities, and your insurer. Give a local contact written permission to enter the property and approve repairs up to a set dollar limit.
Send tenants a brief emergency notice with a direct emergency phone number. Tell them to call immediately about ceiling leaks, loss of heat, suspected burst pipes, or water near outlets or electrical panels. Explain that they should shut off the main water valve only if they know where it is and can reach it safely. Clear instructions help tenants report trouble before conditions worsen.
Do not travel during the storm or send anyone onto an icy roof. Wait until conditions are safe to inspect. Then take time-stamped photos and record tenant reports before arranging repairs.
sbb-itb-aa27f6d
2. Inspect and Repair the Roof Before Winter
With your storm plan ready, turn to the roof. Weak spots are where ice damage starts, so schedule a professional roof inspection in early fall – or as soon as possible if you missed it. North Carolina emergency-preparedness guidance recommends fixing roof leaks before winter storms and asking a qualified contractor whether the roof can handle heavy snow loads or runoff.
Have the roofer check shingles, ridge caps, valleys, flashing, and vent pipe boots. Pay close attention to chimneys, skylights, and roof-to-wall joints, where gaps can let meltwater reach the roof deck and your home’s interior.
Inside the attic, look for water stains, damp spots, and evidence of past leaks. Check fascia and soffits for rot, swelling, or separation, too. These may be early signs that ice or meltwater is getting in.
Use the inspection findings to decide between repair and replacement. Patch isolated defects; replace the roof when damage affects large areas. Recurring leaks, extensive granule loss, damaged decking, or a sagging roofline need a more thorough assessment. Before work starts, get a written scope that spells out the materials, warranty terms, and completion date.
3. Clear and Secure Gutters and Downspouts
Once the roof is sealed, give meltwater a clear path off the house. Clean gutters in late fall, after most leaves have dropped. Remove leaves, pine needles, and sticks, then flush each downspout to check that it drains freely. A gutter can look clear but still have a clog farther down. Blockages trap meltwater at the eaves, where it can freeze and back up under the roof edge.
Have a contractor tighten loose hangers, repair separated joints, and replace cracked sections. Gutters should slope toward the outlets, with no sagging or standing water.
Check where runoff goes. Water should drain off the property promptly. Add downspout extensions or splash blocks to direct it away from the foundation – not across steps or sidewalks, where it can refreeze. If water still pools beside the building, have a professional rental property management team assess the grading and drainage.
After snow or freezing rain, check from the ground for sagging gutters, detached downspouts, and blocked outlets. FEMA recommends checking roof drains, gutters, downspouts, and vents for debris and other obstructions after snow or ice events. Ask tenants to report overflowing gutters, leaks, or detached downspouts. Don’t let them climb ladders or chip away ice; call a pro to handle hazardous buildup.
4. Insulate, Air-Seal, and Ventilate the Attic
Once runoff paths are clear, limit the heat escaping into the attic. That heat can melt roof snow, which then refreezes at the eaves. Insulation and balanced ventilation help reduce the risk of ice dams.
Seal air leaks first. Have a contractor check and seal openings around plumbing and wiring, wall top plates, and the attic hatch. Weatherstrip and insulate the hatch, too. Gaps around chimneys and furnace flues need high-temperature materials and must meet clearance requirements.
After sealing leaks, add insulation to the right depth. Schedule an insulation assessment before winter. ENERGY STAR lists R-38 as a common attic target, but confirm the right specification for your property. Ask for an estimate that includes the material, target R-value, and installed depth.
Keep soffit intake vents clear and maintain an open airflow path to properly designed exhaust vents. Install baffles to keep insulation from blocking airflow at the eaves. Keeping the attic dry also helps protect the plumbing below.
Watch for wet or compressed insulation, blocked soffit vents, missing baffles, and exhaust ducts that end in the attic. Vent bathroom and kitchen fans outdoors, fix moisture sources before adding insulation, and keep dated photos of repairs.
5. Insulate Pipes in Unheated Areas
Protect plumbing in your property’s coldest spots, where frozen pipes and hidden leaks often start. Inspect water supply lines in crawl spaces, attics, garages, and unheated utility rooms. Check beneath sinks along exterior walls, too. Insulate both hot- and cold-water pipes, paying close attention to sections near foundation vents and drafty openings.
Choose foam sleeves or wrap insulation that fits tightly. Where local code requires it, use insulation rated at least R-6.5 – not all foam sleeves meet that standard.
Before installing insulation, repair leaks and dry the pipes. Cover the entire exposed run, including elbows and joints, and seal seams with approved tape or adhesive. Don’t compress the insulation or cover shutoff valves.
If pipes keep freezing, have a licensed professional add protection. Use UL-listed heat cable only where needed, and follow the manufacturer’s instructions.
Photograph completed repairs and check them again after cold snaps or plumbing work. Replace wet or detached insulation, and label the main water shutoff so tenants can find it fast during a leak.
6. Winterize Outdoor Faucets and Water Lines
Once interior pipes are protected, winterize every exterior fixture before Raleigh’s first freeze. Disconnect and drain all garden hoses, splitters, timers, and irrigation attachments. Leaving a hose attached can prevent the faucet from draining properly.
Close the indoor shutoff valve for each outdoor faucet. Then open the outdoor faucet and drain any low points and drain ports. Leave the faucet open afterward unless the manufacturer says otherwise.
A frost-free label doesn’t guarantee protection. Check for attached hoses, an incorrect slope, and exposed interior supply pipes. Add an insulated faucet cover, and seal gaps around the fixture and wall opening to block cold air.
For sprinklers, irrigation, and other permanent outdoor lines, follow the manufacturer’s winterization instructions or hire a qualified contractor. Draining a hose bib won’t winterize these separate systems. Add antifreeze ONLY if the manufacturer or installer specifically directs it.
Give tenants a short checklist:
- Remove hoses and attachments.
- Report dripping or damaged faucets.
- Notify management immediately if water pressure drops or a pipe freezes.
Keep indoor heat steady and seal draft paths before the next cold snap.
7. Maintain Indoor Heat and Seal Drafts
After winterizing outdoor lines, keep indoor heat steady during Raleigh freeze warnings to help prevent frozen pipes. For vacant units or tenants who are away, set the thermostat to 55°F or higher. Drafty homes or exposed plumbing may need a higher setting. Include the minimum temperature in winter notices and lease language.
Have the heating system checked before winter. Make sure it starts, reaches the set temperature, and has clean filters. Keep supply and return registers clear. During cold-weather checks at vacant units, record the indoor temperature, thermostat setting, and utility status.
Seal drafts that let heat escape or cold air reach pipes. Start near plumbing and openings to attics or crawl spaces. Use caulk for stationary cracks, weatherstripping for movable joints, and door sweeps beneath exterior doors.
Check accessible ducts in unheated areas for gaps or damage, and seal seams with mastic or metal-backed foil tape. Keep ventilation and combustion-air openings clear. Hire a qualified contractor for work near combustion equipment.
Give residents an after-hours contact and ask them to report heat loss immediately. Before storms, confirm who will handle emergency HVAC calls and test smoke and carbon monoxide detectors.
Conclusion: Finish Repairs and Share the Storm Checklist
Before the first freeze, check that the property has a sound roof, clear drainage, limited attic heat loss, protected pipes, and reliable indoor heat. Complete urgent repairs before temperatures drop below freezing.
Keep a dated walkthrough log with photos of key systems and the main water shutoff location. Give each unfinished repair an owner, priority, deadline, and cost estimate. Close work orders only after verifying the work and adding photos and service notes. When the record is complete, send the tenant checklist.
Share a short tenant storm checklist now, then resend it 24–48 hours before freezing weather. Tenants should receive the same emergency instructions before every freeze. Include the water shutoff location, how to report an emergency, and what to send: the affected room, whether water is actively flowing, whether heat is unavailable, and any photos or video. Update the checklist after turnover, major repairs, or vendor changes.
If ice causes damage, use the checklist and emergency plan to limit losses. Tell tenants to shut off leaking water only when it’s safe, never thaw plumbing with an open flame, and never use grills, charcoal, or other fuel-burning appliances indoors. Keep emergency contacts and backup ways to communicate ready in case power or internet service fails.
A checklist can’t eliminate every ice-storm risk. Falling branches, heavy ice, and extended outages still call for an emergency plan. Review insurance coverage before winter, and schedule a post-storm inspection to document damage once conditions are safe.
FAQs
How can I protect rental pipes during a power outage?
During a power outage in Raleigh, insulate exposed pipes right away to help them retain heat. If temperatures remain low, leave faucets dripping slightly to help prevent freezing and pressure buildup.
Unicorn Rentals provides 24/7 maintenance coordination in Raleigh and the surrounding Triangle area. Their team can coordinate these preventive steps and help address plumbing problems quickly to protect your rental property.
Who handles ice-related maintenance: landlords or tenants?
Tenants should report leaks, drainage problems, and other maintenance concerns to their landlord or property manager right away to help prevent further damage. Property managers arrange and schedule professional repairs, using licensed and insured contractors to handle structural or system-related damage.
Unicorn Rentals provides 24/7 maintenance coordination and preventive inspections of roofs, gutters, and exterior drainage to help protect properties from ice and water damage.
Does landlord insurance cover ice-storm damage?
Yes – landlord insurance can cover ice-storm damage if your policy lists it as a covered peril. Dwelling coverage protects the rental property. Your policy may also cover lost rental income during repairs if a covered event makes the property uninhabitable.
Check your policy to see which perils it covers and excludes.